Catching a water leak early can save you from expensive damage and stop you paying for water you’re not using. The process runs from a simple meter check through DIY isolation techniques to professional acoustic and thermal tools — and knowing which method to use, in what order, makes the difference between finding a leak quickly and tearing out walls unnecessarily.
Start With the Water Meter Stop-Tap Test
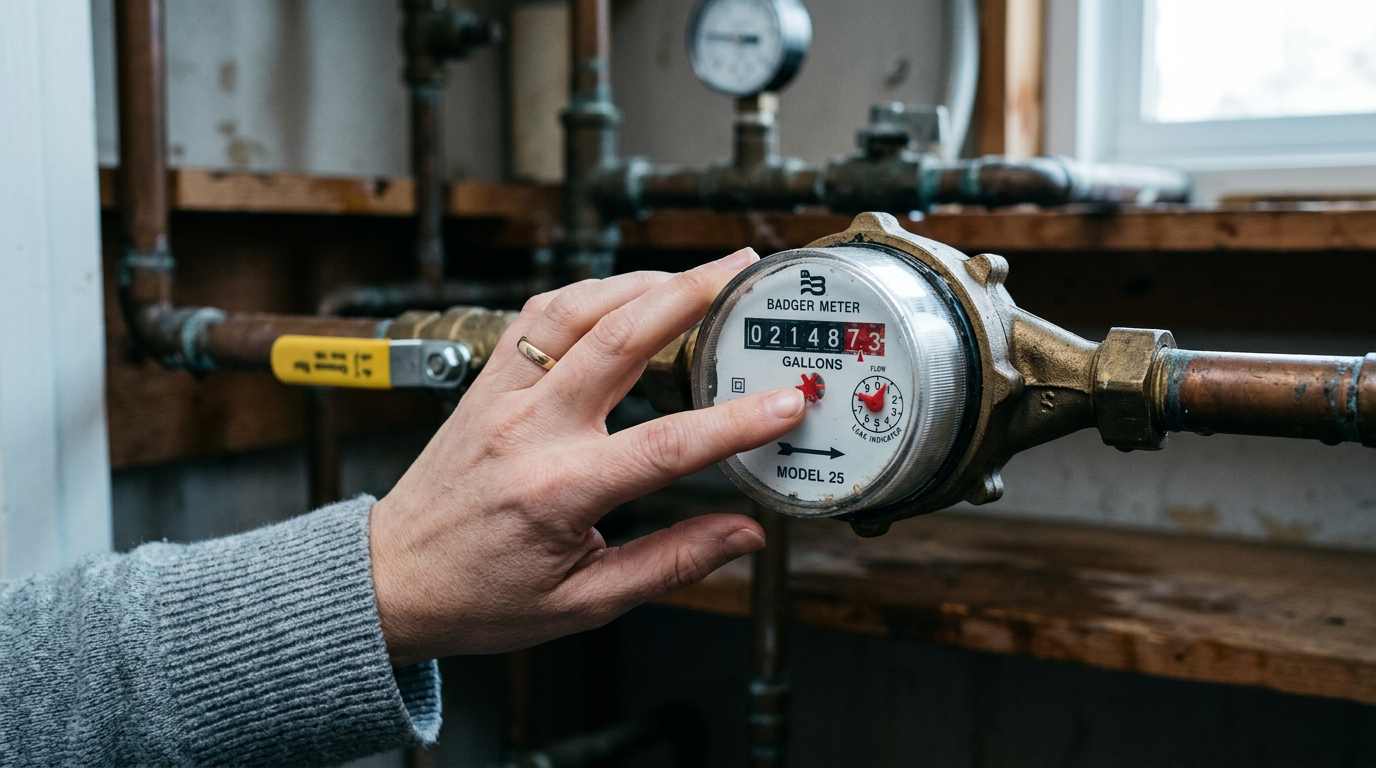
Before anything else, turn off all taps and water-using appliances, then check whether your meter dial or digital display is still moving. If it is, water is flowing somewhere it shouldn’t be. If it’s not moving, there’s no active leak. This single test tells you whether a leak exists before you spend any time looking for one.
If the meter confirms something is wrong, visual symptoms help narrow the search area: unexplained spikes in your water bill, a noticeable drop in water pressure, damp patches or staining on walls and ceilings, peeling paint or wallpaper, and ground sinking or wet patches in the yard. These signs don’t confirm a leak on their own, but they tell you where to start looking.
DIY Methods for Isolating and Locating the Leak
Once the meter test has confirmed a leak exists, zone isolation is the next step. Close the stop-taps serving different zones or fixtures one at a time, then re-check the meter after each one. If the meter stops moving when you isolate a specific zone, the leak is somewhere in that section of pipework or the fixtures it supplies.
From there, inspect the visible pipework in the isolated zone — joints, valves, and connections under sinks, behind toilets, and at appliance inlets. Look for drips, corrosion, mineral deposits, or damp patches around fittings. This hands-on check finds surface-accessible leaks without any specialist equipment. If you find a dripping fitting at a tap or faucet, you can follow the steps to fix a dripping faucet and repair common leaks yourself before the problem gets worse.
For toilets specifically, dye testing is a quick way to check whether the cistern is leaking. Drop dye tablets or a few drops of food colouring into the cistern and wait without flushing. If colour appears in the bowl, the flap valve is leaking.
DIY methods are enough when the leak is surface-accessible. When it’s inside a wall, under a floor, or underground, you need professional tools.
Professional Detection: Thermal Imaging and Acoustic Equipment
When DIY isolation points to a hidden leak but can’t locate it precisely, thermal imaging and acoustic devices are the two main professional options — and they suit different situations.
Thermal imaging works by detecting temperature differences caused by moisture behind walls, floors, and ceilings. A thermal imaging camera produces a visual map of heat variation across a surface, allowing hidden leaks to be found without cutting into anything. It works best when there’s a clear temperature difference between the leak and the surrounding material, making it the preferred method for leaks behind interior surfaces.
Acoustic listening devices detect the sound of water escaping under pressure. Ground microphones and electronic listening rods are placed at intervals along the suspected pipe run, and the signal is strongest directly above the leak. This method works well for underground supply pipes and leaks inside walls where nothing is visible.
When acoustic listening confirms a leak is present but can’t pinpoint the exact spot, acoustic correlating equipment takes it further. Two sensors are placed at different points on the pipe run, and software calculates the precise leak location based on the time difference in sound arrival between the two sensors. This is the standard approach for underground or external supply pipe leaks where ground microphones alone aren’t enough.
Matching the Detection Method to the Situation
The right method depends on where the leak is and what evidence you have.
If you suspect a leak inside a wall, floor, or ceiling, start with visual signs — staining, damp patches, peeling — to narrow the area, then use thermal imaging to find moisture behind the surface without cutting into it. Acoustic listening devices can help pinpoint the source once the zone is identified.
If the leak appears to be underground or on an external supply pipe — indicated by ground sinking, wet patches in the yard, or a meter that keeps moving with all indoor taps off — acoustic ground microphones and correlating equipment are the tools for the job. The meter test confirms the leak exists; professional acoustic detection finds exactly where it is.
If your bill has risen or your pressure has dropped but there are no visible signs, start with the meter stop-tap test. If the meter confirms water is moving with all taps off, isolate zones one by one before moving to professional acoustic or thermal methods. Understanding the hidden plumbing issues homeowners commonly overlook can also help you identify what type of problem you may be dealing with before calling in a specialist.
When to Stop DIY and Call a Professional
The sequence described here is designed to move from confirmation to zone isolation to precise location, with each step narrowing the search before a more targeted method is applied. DIY methods handle surface-accessible leaks. Professional acoustic and thermal tools handle everything inside walls, under floors, and underground — without the need to open up the structure first.
If zone isolation has confirmed a leak is present but you can’t locate it precisely enough to start repairs, that’s the point to bring in professional detection. Before hiring anyone, it’s worth knowing how much a plumber costs in 2026 so you can budget accurately and avoid surprises when quotes come in.
Acting on What the Meter Tells You
The meter is your first and clearest signal — a moving dial with all taps closed means a leak exists somewhere. Zone isolation narrows the search to a section of pipework, and fixture inspection finds anything visible from there. For leaks inside walls or underground, thermal imaging covers interior surfaces and acoustic correlating equipment handles buried pipes. Start with the meter test, work through the DIY steps, and bring in professional tools when the leak is beyond what you can see or reach.